
Включить TLS 1.1 и TLS 1.2
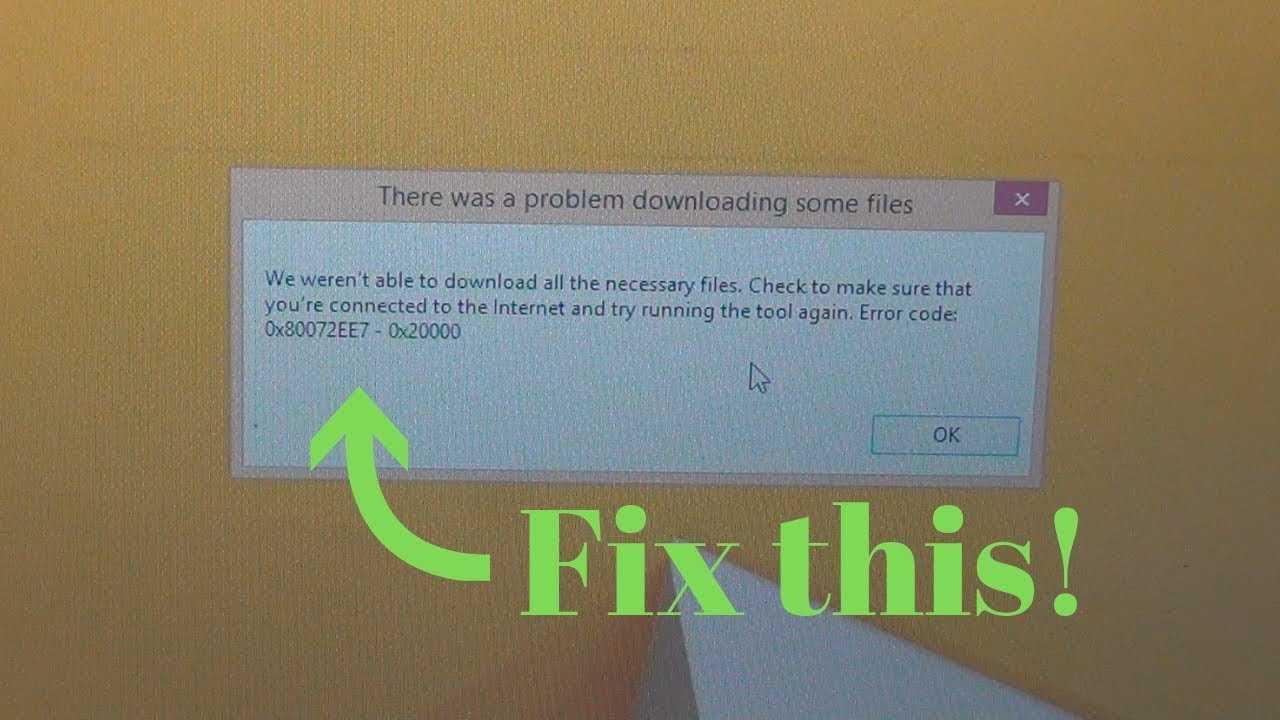
Это одна из наиболее распространенных причин, по которой люди сталкиваются с этим кодом ошибки 0x80072F8F 0x20000. Это может быть связано с тем, что на вашем компьютере может быть включена устаревшая версия TLS.
TLS позволяет устанавливать безопасные и зашифрованные соединения через Интернет. На большинстве устаревших компьютеров с Windows включены только TLS 1.0 и SSL3.
Microsoft, с другой стороны, использует обновленные протоколы безопасности TLS 1.1 и TLS 1.2 для своих серверов.
Эта несовместимость версий TLS может быть причиной того, что каждый раз, когда ваш компьютер пытается установить соединение с сервером Microsoft, происходит сбой соединения и отображается код ошибки 0x80072F8F 0x20000.
Чтобы исправить эту ошибку, необходимо включить TLS 1.1 и TLS 1.2.
Есть два способа сделать это.
- Включить в настройках Интернета с помощью графического интерфейса.
- Внесите изменения в реестр.
Ниже мы рассмотрели оба этих метода.
Включите TLS 1.1, TLS 1.2 и TLS 1.3 с помощью графического интерфейса.
Чтобы включить все эти версии TLS с помощью графического интерфейса, вам необходимо выполнить следующие простые шаги:
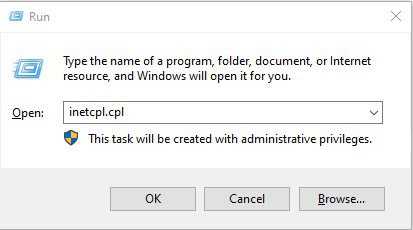
- Прежде всего, запустите окно «Выполнить». Для этого нажмите кнопки Win+R на клавиатуре.
- Введите inetcpl.cpl и нажмите Enter. Это запустит окно свойств Интернета.
- Перейдите на вкладку «Дополнительно».
- Прокрутите список настроек вниз и выберите TLS 1.1, TLS 1.2 и TLS 1.3.
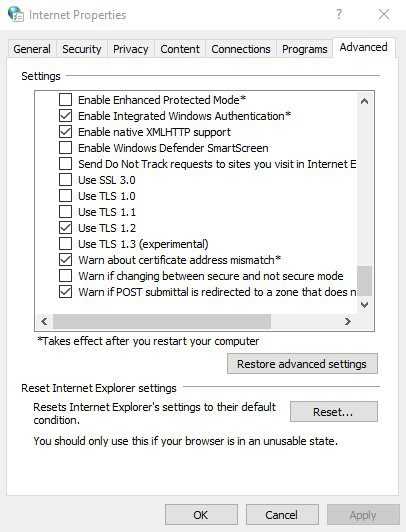
- Нажмите на кнопку ОК, чтобы сохранить все сделанные вами изменения.
- Теперь нажмите кнопку «Применить», чтобы применить все изменения.
- Перезагрузите компьютер.
После этого повторно запустите Media Creation Tool, чтобы проверить, устранена ли ошибка.
Если вы не видите TLS 1.1 и TLS 1.2 в списке, вы можете включить эти версии, только внеся изменения в файл реестра.
Включите TLS 1.1 и TLS 1.2, внеся изменения в реестр.
Отказ от ответственности. Прежде чем продолжить, позвольте мне четко предупредить вас, что этот метод вносит изменения в реестр, что может стать рискованным, если что-то пойдет не так. Я настоятельно рекомендую создать резервную копию текущего реестра.
Выполните следующие простые шаги, чтобы создать резервную копию текущего реестра:
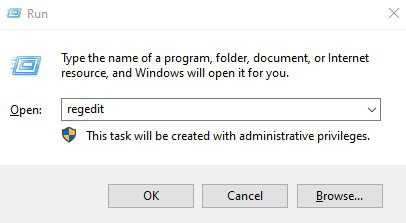
- Прежде всего, запустите команду «Выполнить». Для этого вам нужно нажать клавишу Win + R на клавиатуре.
- В поле для комментариев введите regedit и нажмите клавишу Enter. Это откроет редактор реестра.
Теперь перейдите на вкладку «Файл» и выберите параметр «Экспорт» в раскрывающемся меню.
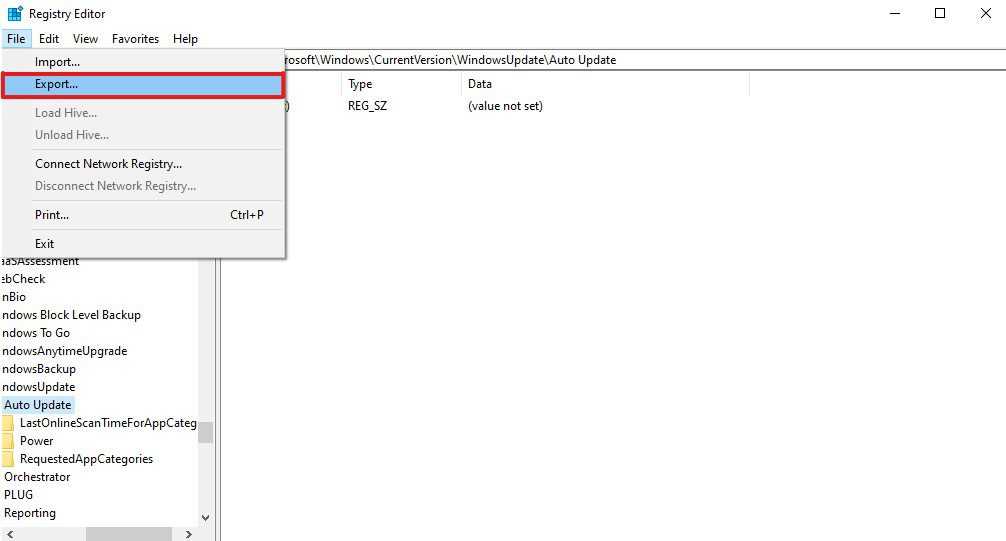
Экспортируйте файл реестра и сохраните его в любой из папок по вашему выбору.
Вот и все. Вы успешно создали резервную копию реестра.
Теперь выполните следующие действия, чтобы внести изменения в параметры реестра Windows:
- Прежде всего, запустите Блокнот.
- Теперь скопируйте этот код и вставьте его в Блокнот –
Windows Registry Editor Version 5.00


"DefaultSecureProtocols"=dword:00000a00


"DefaultSecureProtocols"=dword:00000a00


"DisabledByDefault"=dword:00000000

"Enabled"=dword:00000001


"DisabledByDefault"=dword:00000000

"Enabled"=dword:00000001
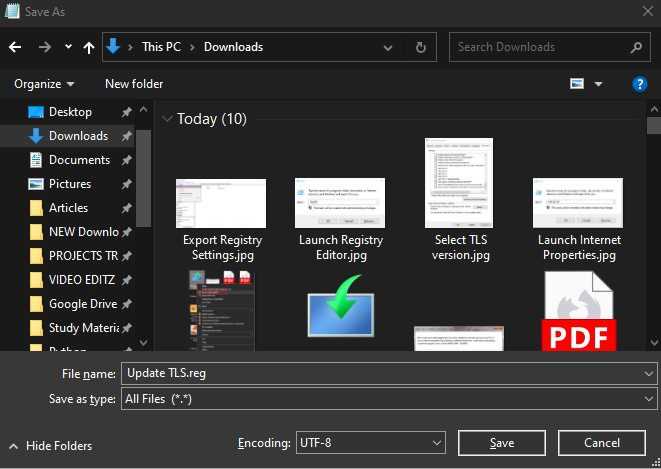
Теперь сохраните этот файл с расширением .reg. Это можно сделать, введя обновление TLS.reg в поле «Имя файла» и выбрав «Все файлы» в списке «Тип файла».
- Теперь найдите этот файл на вашем компьютере с Windows.
- Дважды щелкните по нему, чтобы запустить файл и применить настройки реестра.
- Если появится приглашение UAC, нажмите «Да».
- Как только файл будет выполнен правильно, перезагрузите компьютер.
После перезагрузки компьютера на нем будут включены TLS 1.1 и TLS 1.2.
Теперь запустите Media Creation Tool, чтобы проверить, исправлен ли код ошибки 0x80072F8F 0x20000. Если нет, попробуйте следующий обходной путь.
Solution 1. Install missing update
Fix it now!
Fix it now!
To repair damaged system, you have to purchase the licensed version of Fortect Mac Washing Machine X9.
An update KB3140245 allows you to enable TLS 1.2 protocol, as a Windows upgrade would not work otherwise. If your device is missing this update, it will result in an error when trying to upgrade. Note: this is for Windows 7 and 8 users only.
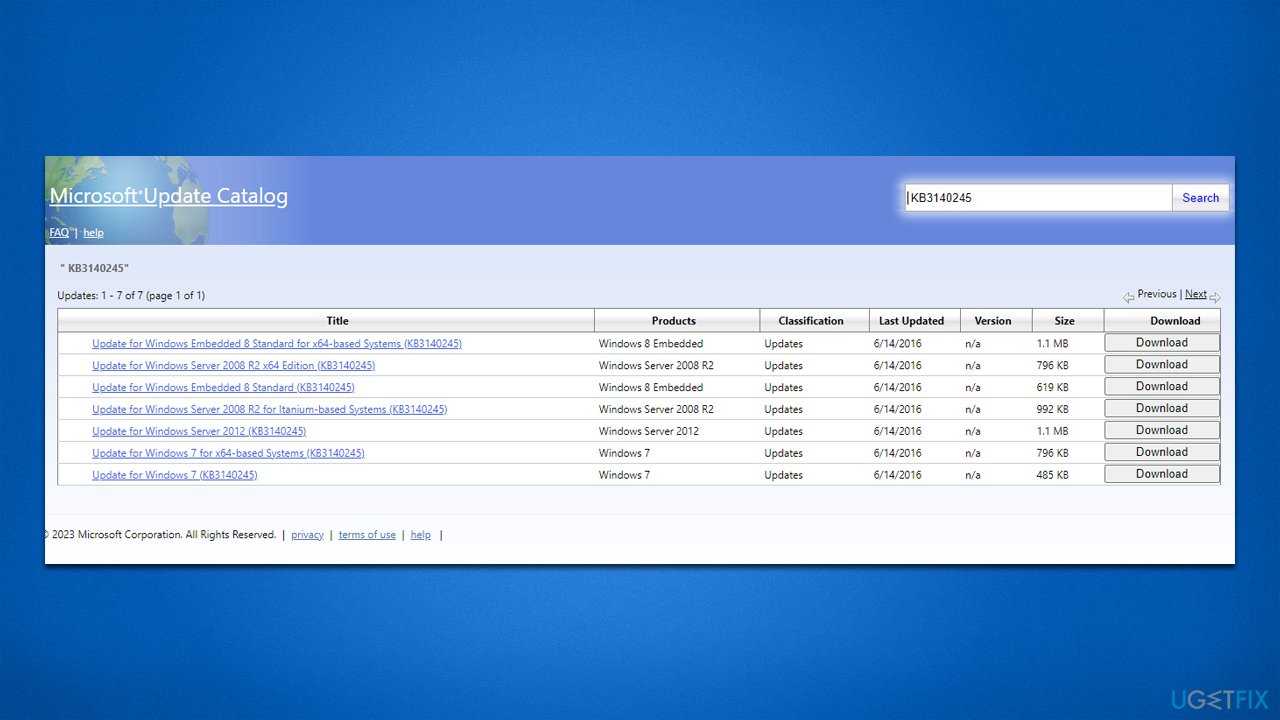
- Open your browser and navigate to Microsoft Update Catalog.
- Type KB3140245 in the search field and click Search or hit Enter.
- Here, select the correct version of the update that applies to you:
- Right-click on Start and pick System.
- Under Device specifications, check the System type section: it should either be 64-bit or 32 bit.
- Now, scroll down to Windows specifications and check the Version section.
- With all this information, pick the correct version for your device.
- Download and install the update by using on-screen instructions.
- Reboot your system.
Once installed, please follow up with the steps below and only then attempt to upgrade your OS again.
Causes behind Error Code 0X80072F8F – 0X20000
There can be several reasons behind this error on your Windows. We are going to briefly explain some of the most prominent reasons, so that you can better understand what is causing this error on your Windows computer.
- Issues Related to Essential Services: There are several Windows Services which are required to run properly if you want this installation process to be completed successfully. However, due to certain reasons if some of these essential services are either not running properly or are not running at all, then you will surely encounter errors in your operations.
- Conflict Among Applications: If there are multiple applications running and using the same system files, then it can cause conflicts among those apps which will eventually cause the error code 0X80072F8F – 0X20000.
- Third Part Security Software: Sometimes security software like some antivirus installed on your computer can cause this error because it stops or obstructs the download of files from the internet.
- Lack of Administrator Privileges: For installing Windows you need Admin privileges, but if you don’t have them, then you won’t be able to complete this task.
- System isn’t Compatible: There are certain minimum system requirements for Media Creation Tool and Windows 10 OS. If your computer doesn’t satisfy those requirements, then installing Windows by using Media Creation Tool won’t be possible.
- Transport Layer Security is Turned Off: TSL services offers security to the data transferred over the internet. However, if the TLS 1.1 and 1.2 are disabled, then you will encounter error code 0X80072F8F – 0X20000.
- Poor Internet Connection: To properly download and install the Windows 10 OS you will require a stable internet connection running on decent speed. If you lack such an internet connection, then you won’t be able to complete this task.
As you can see, there are several reasons which can cause the error code 0X80072F8F – 0X20000 on Windows when you are using Media Creation Tool to install Windows 10. Don’t worry, all these problems have their solutions, which we are going to describe below.
Ответы на вопросы
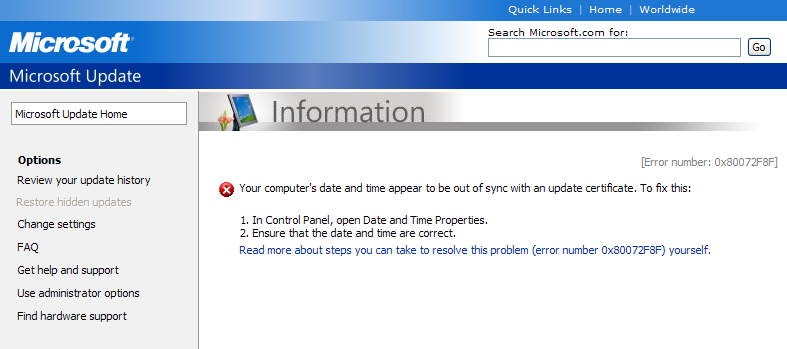
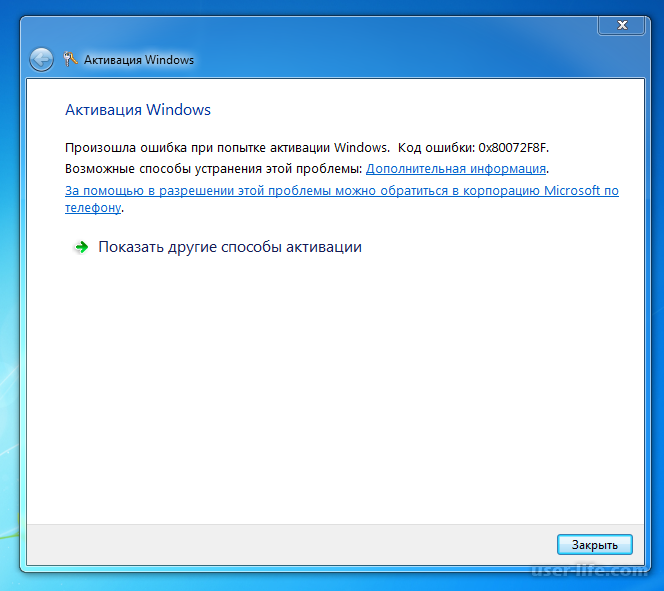
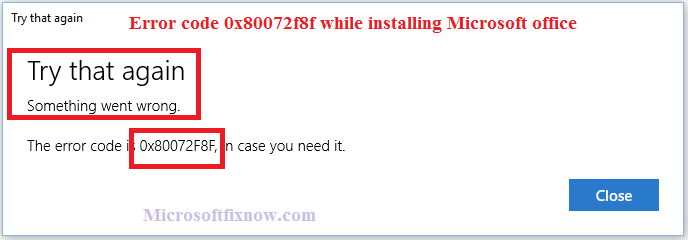
Что значит ошибка 0x80072f8f?
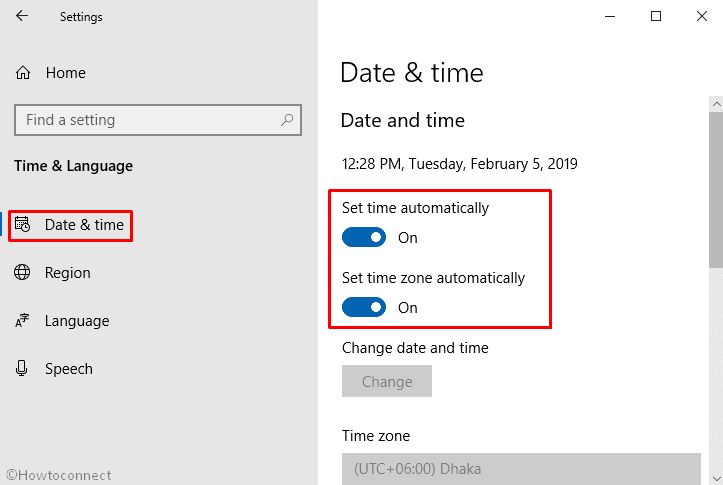
Ошибка 0x80072f8f обычно возникает при попытке обновления Windows или при использовании Media Creation Tool. Это указывает на проблемы с датой и временем на компьютере, так как система не может проверить сертификаты безопасности, если время на компьютере не совпадает с временем на сервере.
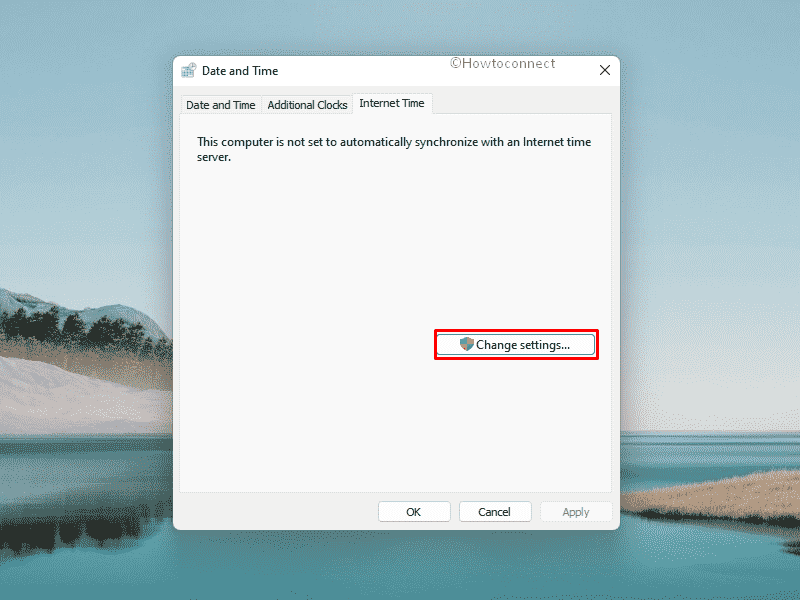
Как исправить ошибку 0x80072f8f при обновлении Windows?
Первым шагом является проверка даты и времени на компьютере. Если они неправильные, то нужно их исправить. Также можно попробовать отключить временную службу защиты Windows, так как это может привести к проблемам с сертификатами безопасности. В некоторых случаях может помочь перезагрузка компьютера.

Как исправить ошибку 0x80072f8f при использовании Media Creation Tool?
Для исправления этой ошибки при использовании Media Creation Tool нужно проверить дату и время на компьютере, так как ошибка возникает из-за проблем с проверкой сертификатов безопасности. Также можно попробовать временно отключить антивирусное ПО или другое ПО защиты, которое может блокировать доступ к серверу.
Что делать, если исправление даты и времени не помогло?
Если исправление даты и времени не помогло, то можно попробовать удалить временные файлы Windows Update и папки кэша, а также проверить настройки прокси-сервера и временно отключить антивирусное ПО на компьютере.
Как проверить настройки прокси-сервера, чтобы исправить ошибку 0x80072f8f?
Чтобы проверить настройки прокси-сервера, нужно перейти в раздел «Настройки» — «Сеть и Интернет» — «Прокси», если компьютер использует прокси-сервер для подключения к Интернету. Сделать это можно на Windows 10. Если прокси-сервер назначен неправильно, то можно отключить его или настроить его на правильный адрес и порт.
Может ли установка SSL-сертификата на сервер помочь исправить ошибку 0x80072f8f?
Установка SSL-сертификата может помочь исправить ошибку 0x80072f8f в некоторых случаях, если ошибка возникает из-за проблем с проверкой сертификатов безопасности. Но, как правило, это не является необходимым, так как проблема может быть решена на стороне клиента.
Как проверить наличие обновлений Windows?
Чтобы проверить наличие обновлений Windows, нужно перейти в раздел «Настройки» — «Обновление и безопасность» — «Windows Update». Здесь будут отображены доступные обновления, которые можно установить.
Что делать, если проверка наличия обновлений не работает из-за ошибки 0x80072f8f?
Если проверка наличия обновлений не работает из-за ошибки 0x80072f8f, то нужно сначала исправить эту ошибку, проверив дату и время на компьютере и, если необходимо, временно отключив антивирусное ПО или другое ПО защиты. После этого можно попробовать выполнить проверку наличия обновлений еще раз.
Как установить обновления Windows, если проверка наличия обновлений прошла успешно?
Чтобы установить доступные обновления Windows, нужно нажать кнопку «Установить» в разделе «Настройки» — «Обновление и безопасность» — «Windows Update». После этого можно дождаться завершения процесса установки обновлений, который может занять некоторое время.
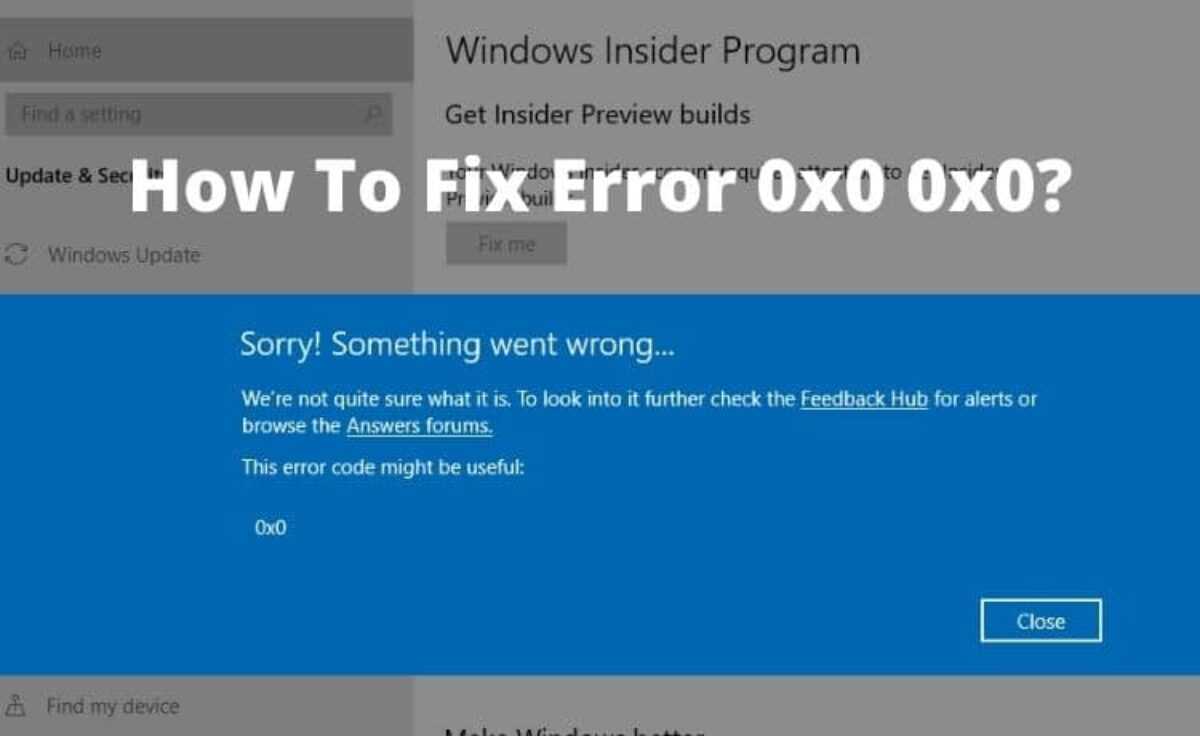
🔵What causes error code 0x80072f8f – 0x20000?
There are multiple causes for this error, with these being the most common ones:
- Lack of privileges – Certain tools require administrative privileges, and to use them you need to make apps run as admin.
- App conflicts – Third-party applications can sometimes come into conflict with Media Creation Tool and cause this problem. If that’s the case, you need to find and uninstall those programs.
- Corrupted cache files – Sometimes installation cache can get corrupted. If that happens, deleting the SoftwareDistribution directory might help.
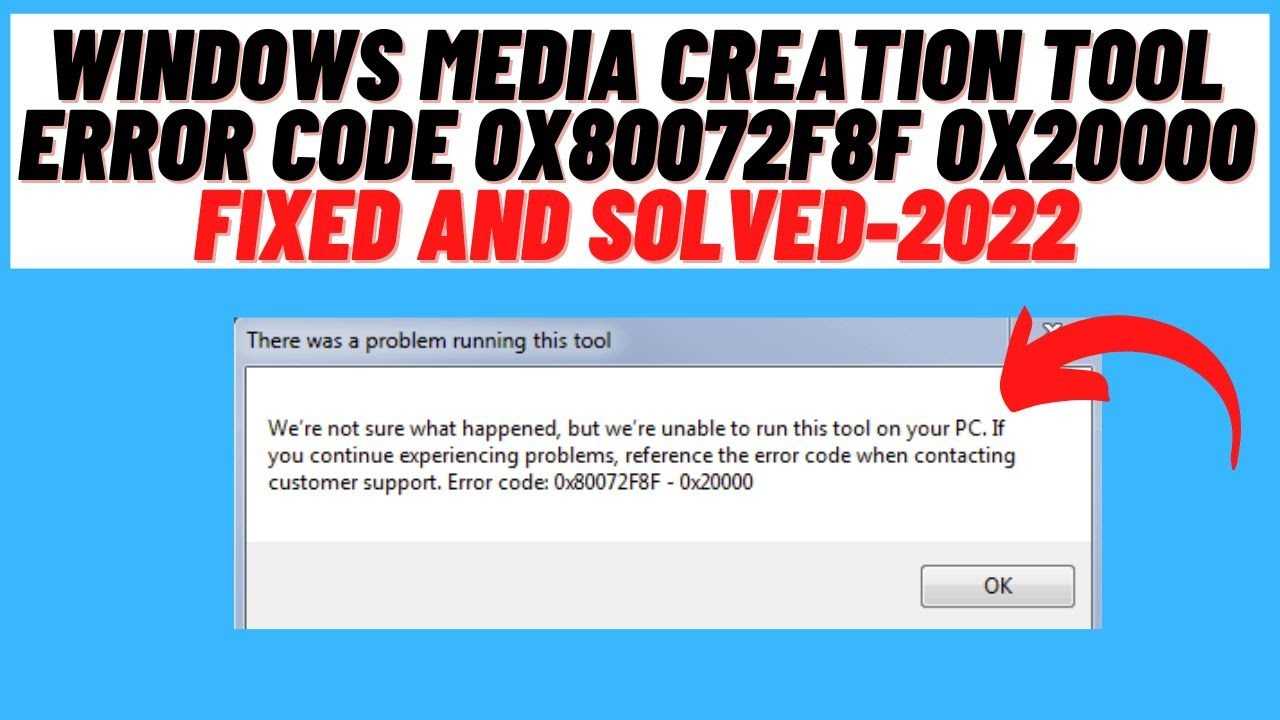
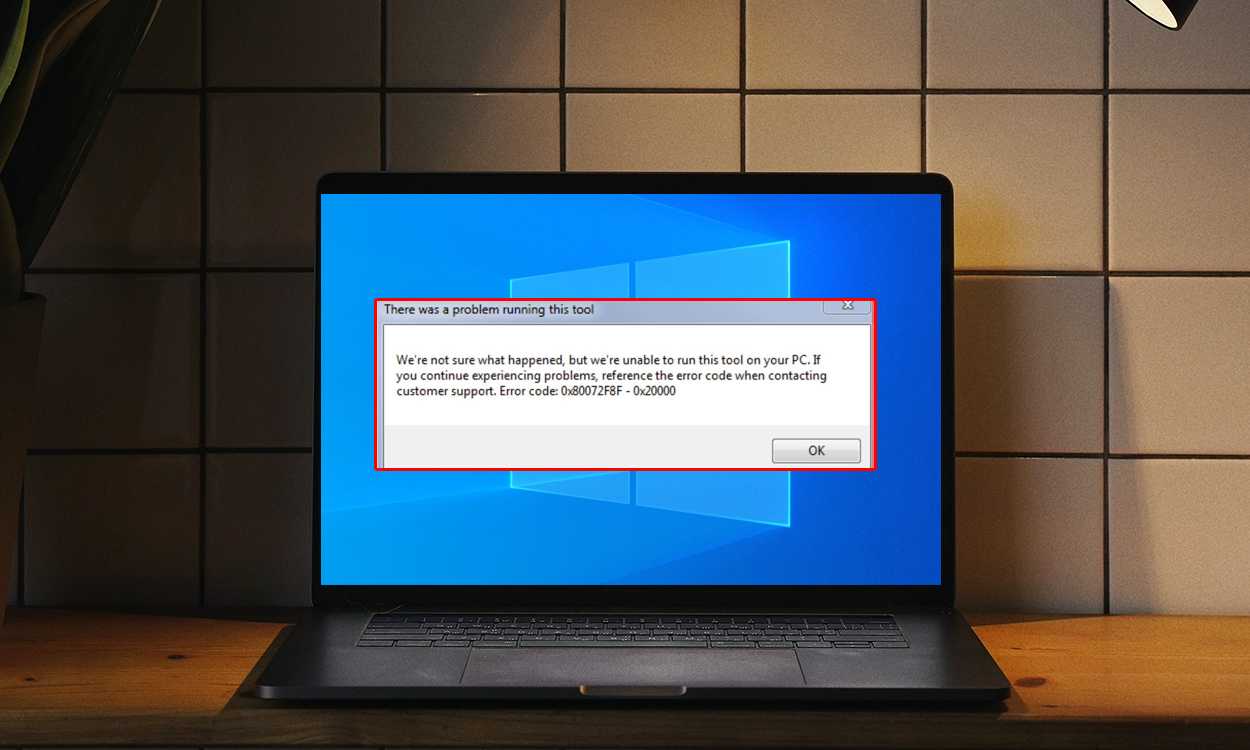
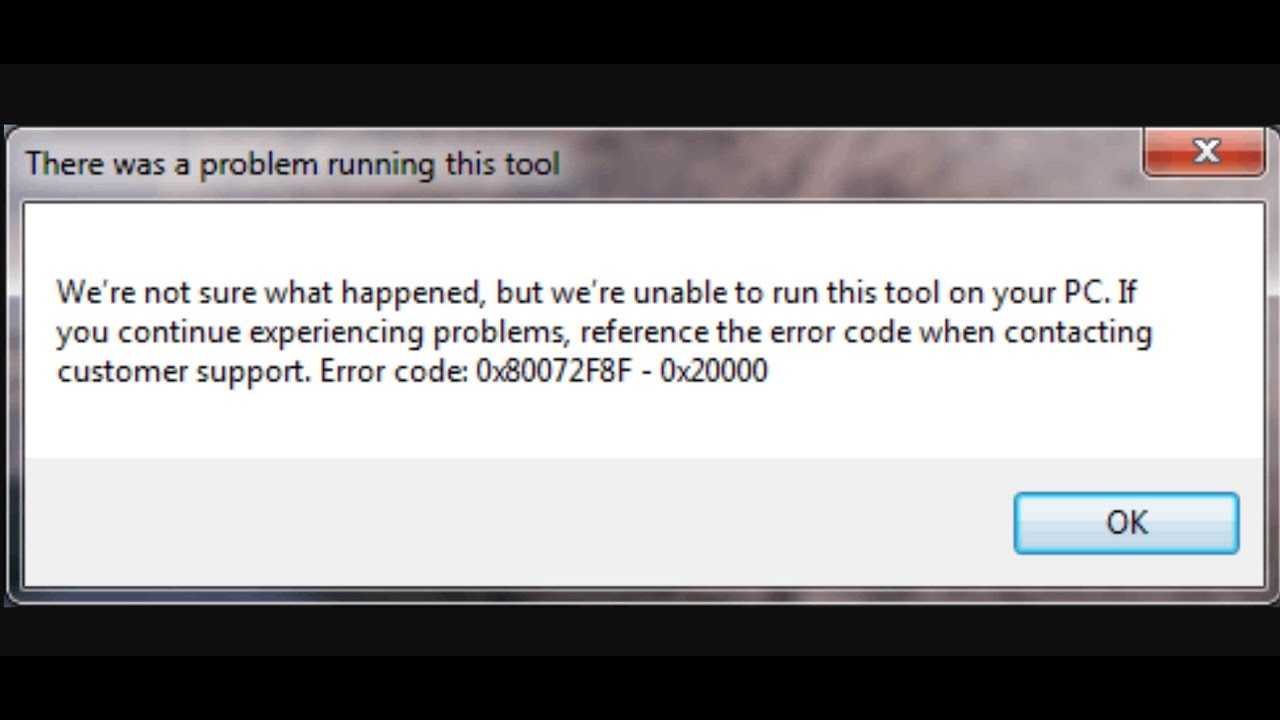
If you have these problems and you’re getting an error message when trying to run Media Creation Tool stating that There was a problem running this tool, check the tested fixes below.
Очистить папку SoftwareDistribution
Как уже объяснялось, иногда код ошибки 0x80072F8F 0x20000 может возникать из-за поврежденных кешей и временных файлов. Если упомянутые выше обходные пути не помогли вам, вы можете попробовать удалить файлы из папки SoftwareDistribution.
Почему именно эта папка? Ну, это потому, что всякий раз, когда вы пытаетесь установить обновление Windows, все временные файлы, необходимые для установки, сохраняются в подпапке этой папки SoftwareDistribution.
Здесь вы можете очистить папку SoftwareDistribution на своем ПК и исправить код ошибки 0x80072F8F 0x20000.
Прежде всего, запустите командную строку. Вы можете сделать это, нажав Win+R, введя cmd в поле, а затем нажав CTRL+Shift+Enter.

Теперь вам нужно остановить Центр обновления Windows и фоновые интеллектуальные службы передачи. Для этого вы можете ввести следующие команды одну за другой, за каждой из которых следует клавиша Enter:
Net Stop wuauserv
Net Stop bits
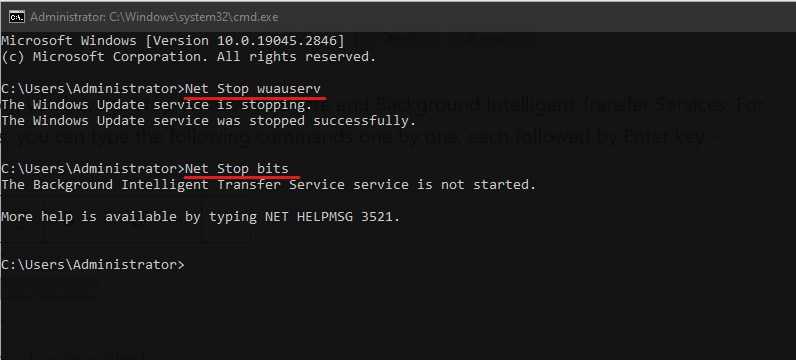
Не закрывайте командную строку, так как нам придется снова перезапустить эти службы.
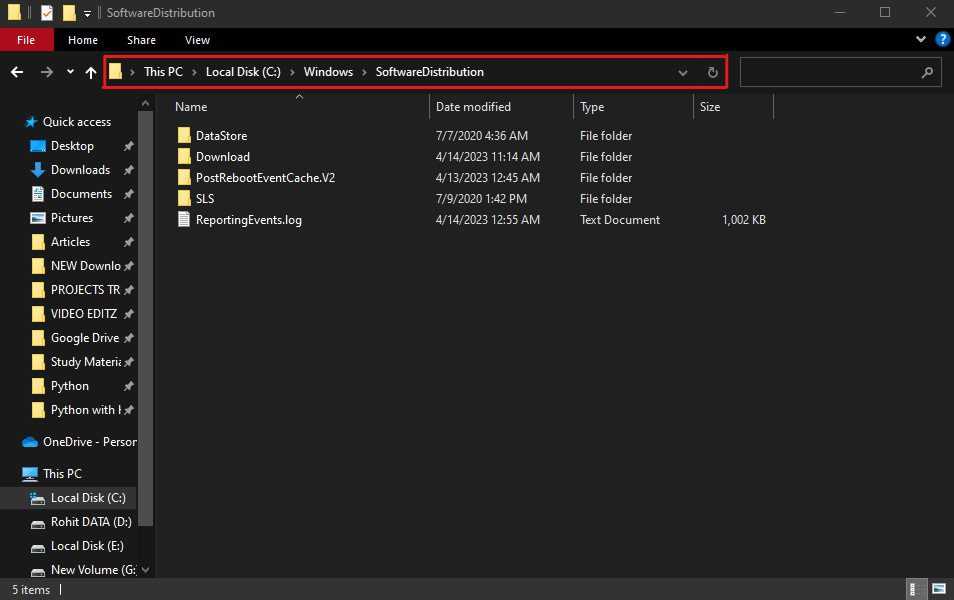
- Запустите проводник Windows. Вы можете сделать это, просто нажав клавишу Win + E.
- Введите указанный ниже общий путь в адресной строке и нажмите Enter.
C:\Windows\SoftwareDistribution
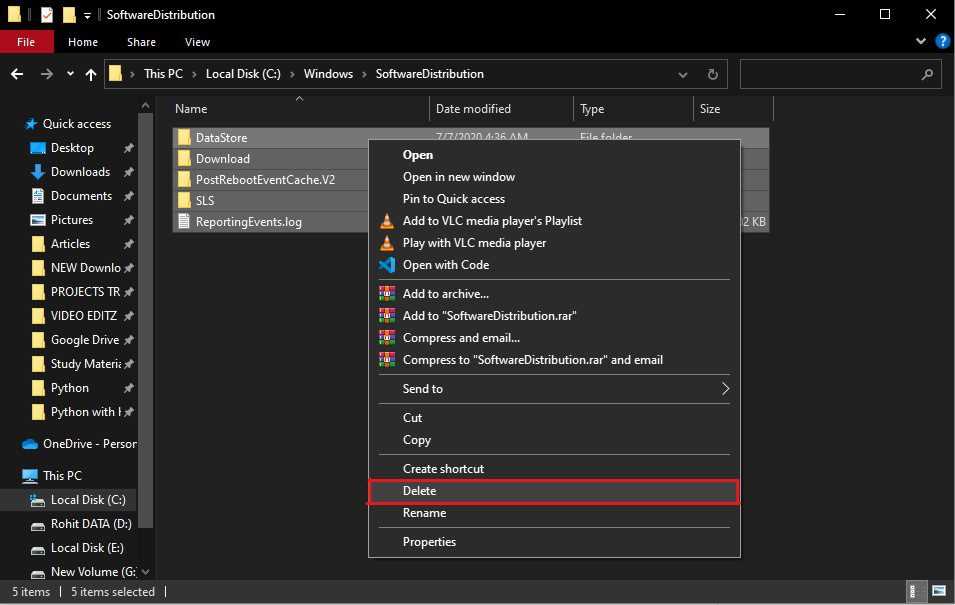
Выберите все файлы внутри этой папки и удалите их. Вы можете сделать это, просто нажав CTRL+A, а затем клавишу Del. Если запрашиваются административные разрешения, выберите вариант «Продолжить».
Вернитесь в командную строку, чтобы перезапустить службы, которые мы остановили ранее. Для этого просто введите ниже общие команды одну за другой, за каждой из которых следует клавиша Enter –
Net Start wuauserv
Net Start bits
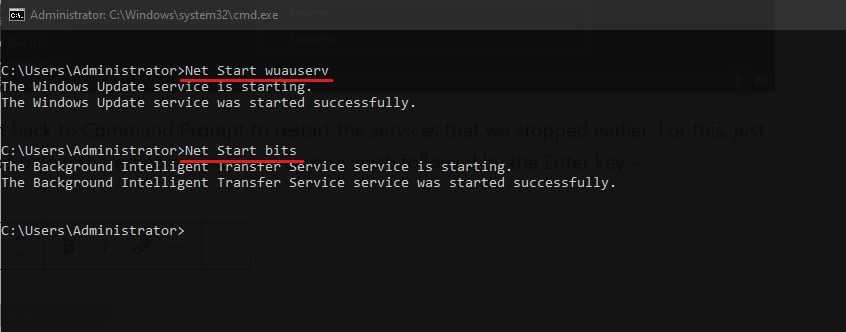
Теперь перезагрузите компьютер и повторно запустите Media Creation Tool, чтобы проверить, сохраняется ли проблема.
Enable Recent TLS Versions
The Media Creation Tool needs to communicate with some servers for its operation. However, some of these servers only support TLS 1.1 or TLS 1.2 which are not enabled in the Windows 7 SP1 version.
Fortunately, Microsoft has provided updates and instructions on some registry changes to enable these protocols.
- Ensure you already have Service Pack 1 (SP1) for Windows 7 or Server 2008 R2.
- Then, go to the Microsoft Update Catalog and search for the KB3140245 update.
- Download the update for your Windows version and architecture (x64 or x86) but don’t install it now.
- Then, you need to add some registry entries.
- Open Run by pressing Windows + R.
- Type and press Enter to open Registry Editor.
- Navigate to
- Right-click on an empty area and select New > DWORD (32-bit) Value.
- Set its name as
- Double-click on it. Check Hexadecimal and set the Value data to to enable TLS 1.1 and 1.2.
- If you have a 64-bit system, go to and add the same registry entry with the same value.
- You can also run this Microsoft easyfix to automatically make these changes to Registry Editor.
- Then, you may need to make more registry changes depending on your system. So, it’s better to do so just in case.
- Go to in Registry Editor.
- Right-click on Protocols. Select New > Key.
- Set its name to
- Create another key with the name inside Protocols in the same way.
- Create a key inside both TLS 1.1 and 1.2 by right-clicking on these subkeys.
- Go inside TLS 1.1/Client.
- Right-click on Client and select New > DWORD (32-bit) Value and set the name to .
- Make sure its value stays .
- Create other DWORD with the value inside Client.
- Now, create DisabledByDefault and Enabled enter inside TLS 1.2/Client as well and set their values to 0 and 1 respectively.
- Now, install the KB3140245 update you downloaded earlier.
- Restart your PC and try running Media Creation Tool again.
Solution 10: Clean the Primary Hard Drive
You should use the Disk Cleanup utility of Windows to clean the primary hard drive. Doing this will free-up the space on your hard drive as it will remove all the unnecessary files. Freeing-up this space will help in the installation of the new Windows 10 version. Follow the steps given below:
- Open File Explorer window, inside This PC, locate and right click on ‘C Drive’, then select ‘Properties’ from the option.
- In the Properties window, under General tab, click on the ‘Disk Cleanup’ button.
- Wait for the Disk Cleanup to perform the necessary calculation.
- In the Disk Cleanup window, select all the files, then click on the ‘OK’ button.
That’s it, you have cleaned up the primary drive. Check if the problem persists.
Solution 5. Edit the Registry
Fix it now!
Fix it now!
To repair damaged system, you have to purchase the licensed version of Fortect Mac Washing Machine X9.
- Press the Windows + R keys simultaneously to open a run dialog box
- Type regedit in the box and press Enter
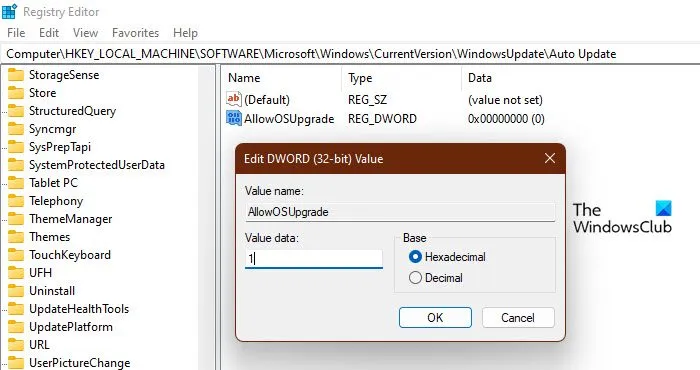
- Once the Registry is opened, navigate to the following path
Computer\HKEY_LOCAL_MACHINE\SOFTWARE\Microsoft\Windows\CurrentVersion\WindowsUpdate\Auto Update
- Now right-click on the empty space and hover the over New
- Select DWORD (32-bit) from the listed option and name it as AllowOSUpgrade
- Double click on the file and change its value data to 1
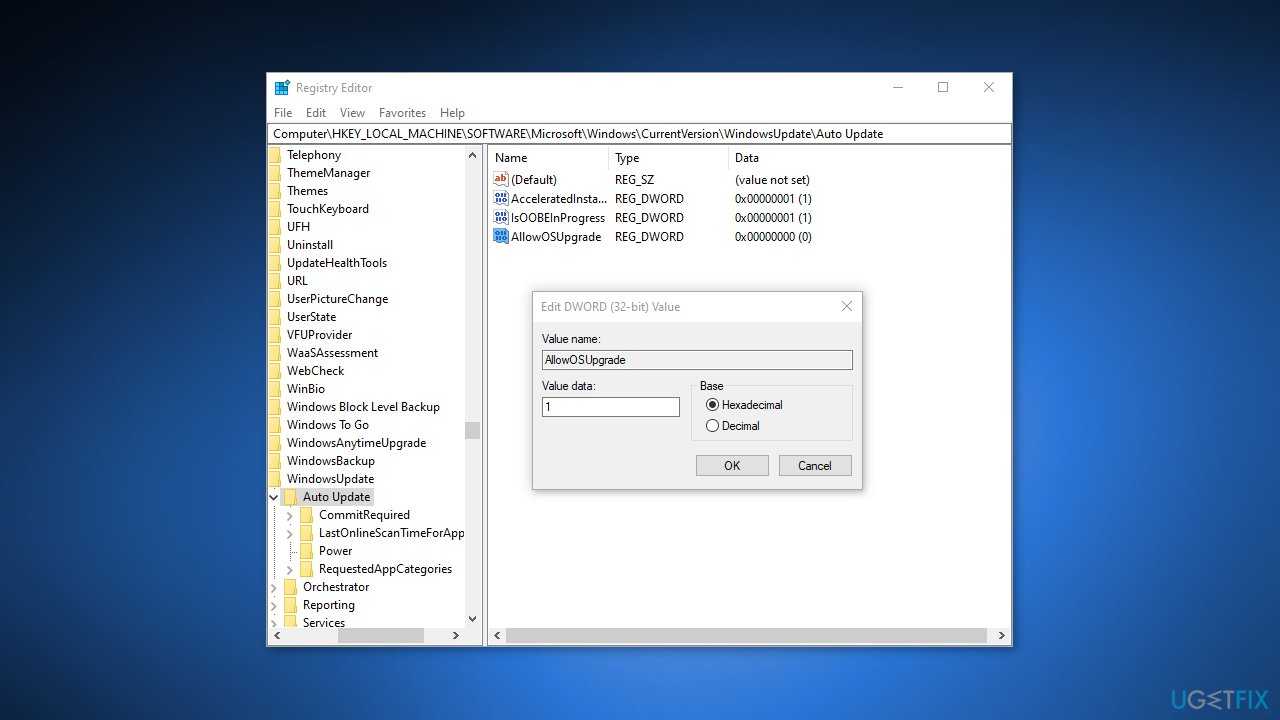
Once done, press OK to save the changes then check if the issue persists
Data recovery tools can prevent permanent file loss
Data recovery software is one of the options that could help you recover your files. Once you delete a file, it does not vanish into thin air – it remains on your system as long as no new data is written on top of it. Data Recovery Pro is recovery software that searchers for working copies of deleted files within your hard drive. By using the tool, you can prevent loss of valuable documents, school work, personal pictures, and other crucial files.
About the author
Ugnius Kiguolis
— The problem solver
Ugnius Kiguolis is the founder and editor-in-chief of UGetFix. He is a professional security specialist and malware analyst who has been working in IT industry for over 20 years.
Contact Ugnius Kiguolis
About the company Esolutions
References
- TLS Basics. Internetsociety. Internet Technologies Blog.
- Chris Hoffman. Everything You Need To Know About the Blue Screen of Death. Howtogeek. Tech Insight Magazine.
- Tim Fisher. What Is the Windows Registry?. Lifewire. Software and Apps.
Solution 11: Get the Windows ISO File
Downloading the Windows ISO file from the Microsoft website can solve this error code. Follow the steps given below to download the Windows ISO file:
- Go to the Windows Media Creation Tool webpage. There, under the ‘Create Windows 10 installation media’ section, click on the ‘Download Now’ button.
- Right click on the newly downloaded Media Creation Tool file and choose the ‘Run as Administrator’ option.
- Wait for the Windows Media Creation Tool to start.
- Wait as the app gets ready for the process.
- Click on the ‘Accept’ button to agree with the license terms.
- Wait for the app to move to the next step.
- Choose ‘Create installation media’ option, then click on the ‘Next’ button.
- Make all the selections according to your requirements, then click on the ‘Next’ button.
- Choose the ‘ISO file’ option, then click on the ‘Next’ button.
- Make sure that the file is getting saved in your desired location and type the file name to ‘Windows’, then click on the ‘Save’ button.
- Wait for the app to download the Windows 10 ISO file.
- After the Windows 10 ISO file download is completed successfully, then right click the file and choose ‘Mount’ option to open the file.
- Locate and right click the ‘setup.exe’ file inside the ISO file and choose ‘Run as administrator’ from the options.
This will start the updating of Windows to its latest version. Follow the on-screen prompts to complete the installation process.
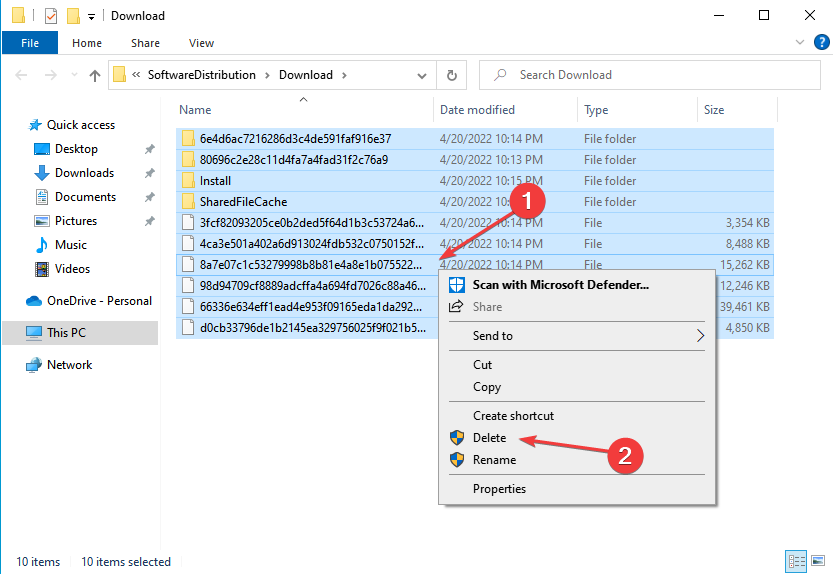
4. Delete the Content of the Software Distribution Folder
Another solution that worked for users was deleting the contents of the Software Distribution folder. This folder contains temporary files that might be interfering with the process of the Media Creation Tool.
If this scenario is applicable, deleting the contents of the Software Distribution folder by following the steps below should do the trick for you.
-
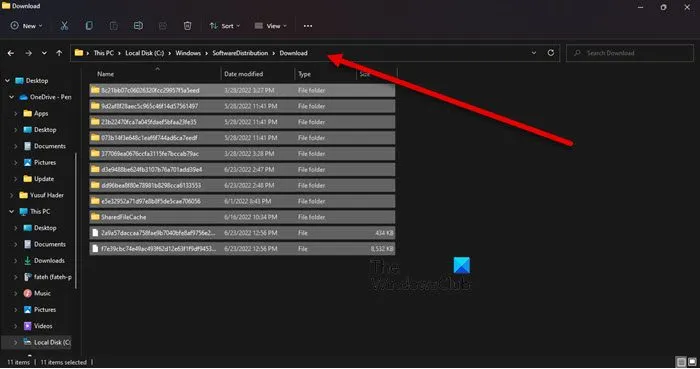
Launch File Explorer and navigate to the location below:
- Select all the contents of the Download folder and right-click on them.
- Click on the bin icon in the context menu to delete them.
- Once you delete the files, type cmd in the search area of the taskbar and select Run as administrator.
-
Type the following command in the Command Prompt window and hit Enter.
- Then, restart your PC and try launching Media Creation Tool again.
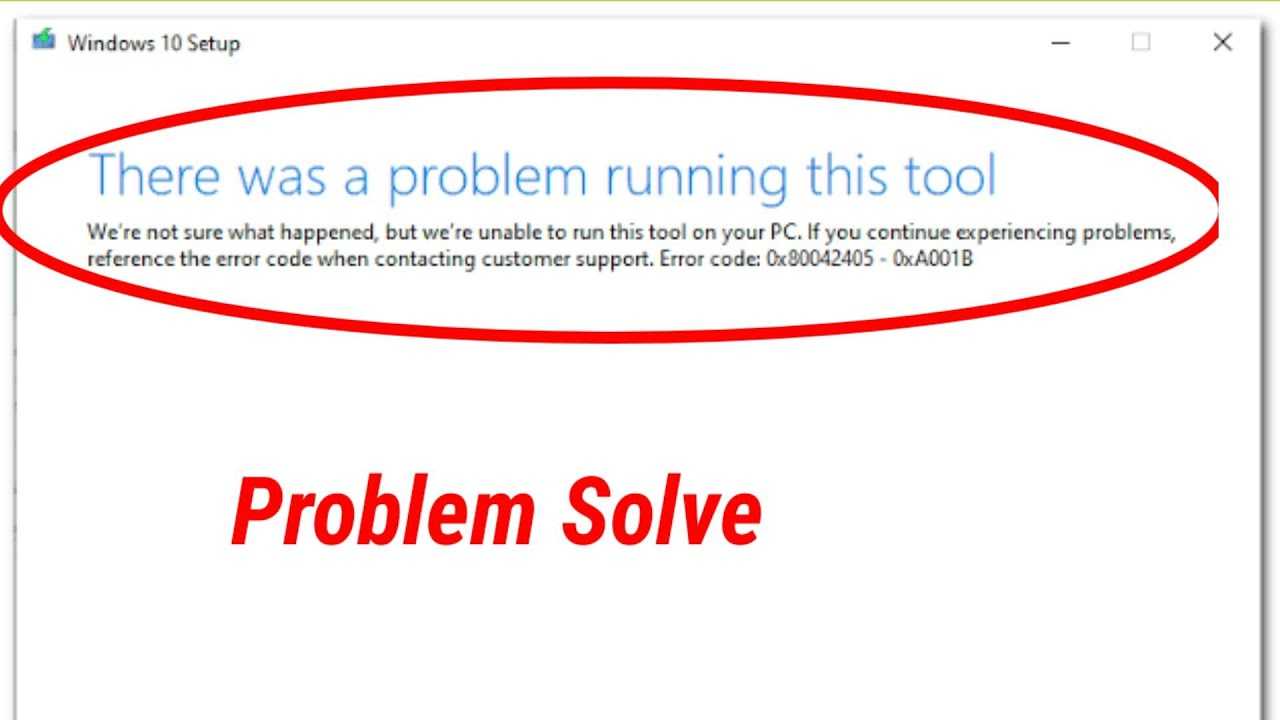
Как исправить ошибку 0x80072F8F
Если вы столкнулись с ошибкой Fix 0x80072F8F — 0x20000 Windows Upgrade, попробуйте следующие решения.
Запустите Media Creation Tool от имени администратора
Начнем с запуска Media Creation Tool от имени администратора. Просто щелкните инструмент правой кнопкой мыши и выберите « Запуск от имени администратора» . Вы увидите окно UAC с просьбой подтвердить ваши действия, поэтому нажмите «ОК». Теперь вы можете просто использовать инструмент в обычном режиме и обновить его.
Разблокируйте Media Creation Tool
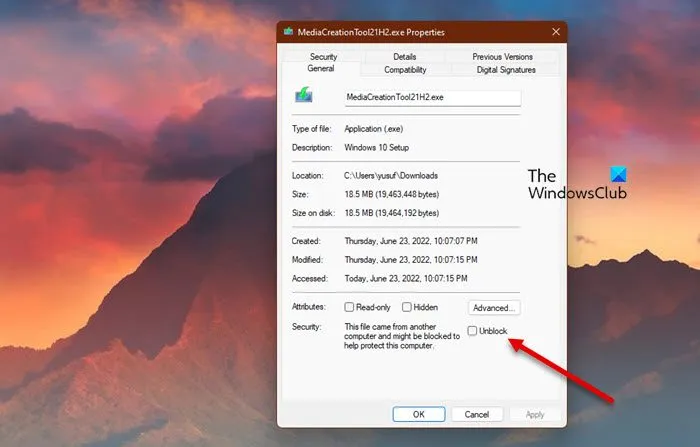
Некоторым пользователям удалось решить проблему, просто разблокировав Media Creation Tool. Итак, вы должны попробовать сделать то же самое и посмотреть, сработает ли это для вас. Выполните предписанные шаги, чтобы разблокировать Media Creation Tool.
- Щелкните правой кнопкой мыши инструмент создания носителя и выберите « Свойства».
- Убедитесь, что вы находитесь на вкладке «Общие» и установите флажок «Разблокировать».
- Нажмите «Применить» > «ОК».
- Теперь попробуйте запустить инструмент и посмотрите, поможет ли это.
Переместите Media Creation Tool на рабочий стол
Для некоторых пользователей решение было таким же простым, как перемещение загруженного Media Creation Tool на рабочий стол. Вы также можете попробовать это, так как это не займет у вас много времени. Просто щелкните правой кнопкой мыши инструмент создания мультимедиа и выберите «Копировать», перейдите на рабочий стол и нажмите Ctrl + V, чтобы вставить файл. Или перетащите инструмент из проводника на рабочий стол на правой панели. Это сделает работу за вас.
Удалите Software Distribution Folder
Папка распространения программного обеспечения содержит временные файлы, которые могут мешать процессу и вызывать рассматриваемый код ошибки. Мы собираемся очистить содержимое этой папки и посмотреть, работает ли это.
Прежде всего, откройте командную строку от имени администратора и выполните следующую команду.
net stop wuauserv net stop bits
Теперь перейдите в папку C:WindowsSoftwareDistributionDownload и удалите все файлы и папки внутри. Вы можете нажать Ctrl + A, чтобы выбрать все содержимое, а затем Ctrl + D, чтобы удалить его.
Теперь в окнах командной строки введите следующие команды по одной и нажмите Enter:
net start wuauserv net start bits
Наконец, выполните следующую команду.
wuauclt.exe /updatenow
Теперь вы можете перезагрузить компьютер и запустить Media Creation Tool.
Редактируйте реестр
Если очистка папки Software Distribution не сработала, давайте отредактируем реестры и посмотрим, поможет ли это. Для некоторых пользователей проблема была вызвана неправильно настроенным редактором реестра и была легко решена с помощью следующих шагов.
Откройте редактор реестра, выполнив поиск в меню «Пуск».
Перейдите к следующему местоположению.
КомпьютерHKEY_LOCAL_MACHINEПРОГРАММНОЕ ОБЕСПЕЧЕНИЕMicrosoftWindowsCurrentVersionWindowsUpdateАвтообновление
Щелкните правой кнопкой мыши пустое место и выберите « Создать» > «Значение DWORD (32-разрядное)».
Назовите его AllowOSUpgrade и установите значение 1.
Сохраните изменения, нажав Ok.
Наконец, перезагрузите компьютер и попробуйте запустить Media Creation Tool.
Включите TLS
TLS или Transport Layer Security — это протокол, и он необходим для запуска инструмента. Если протокол отключен, вы можете увидеть соответствующий код ошибки при попытке обновить ОС с помощью Media Creation Tool. Итак, давайте включим его и посмотрим, поможет ли это.


Прежде чем двигаться дальше, вы должны сделать резервную копию вашего реестра , если что-то пойдет не так. После резервного копирования реестров откройте Блокнот и вставьте следующее содержимое.
Редактор реестра Windows версии 5.00
Теперь сохраните файл под любым именем, но обязательно добавьте .reg в качестве расширения. Лучше сохранить файл на рабочем столе и с легко запоминающимся именем для быстрого доступа.
Наконец, дважды щелкните файл на рабочем столе, и реестр будет добавлен.
Осталось только перезагрузить компьютер и воспользоваться инструментом Media Creation.
Windows update error 0x80072f8f
If you see this error code during Windows update, try the 3 methods below.
Fix 1 Install root certificate update
Some users reported that the installation of root certificate update helps fix error 0x80072f8f. Since this update is expected to fix issues related to your computer’s connection with the Windows Update server, we can give it a shot.
- Navigate to Microsoft Update Catalog. Type Root Certificate Update and click Search.
- Find the version that matches your computer and download it.
- Then follow the on-screen instruction to complete the installation.
Then run a Windows update to check if the error code is resolved. If not, move on to try fix 2.
Fix 2 Re-register DLL files
If some DLL (Dynamic Link Library) files on your computer are malfunctioning, they may cause problems when connecting to the Windows Update servers. Hence, you may want to re-register these files with the following steps:
- Type cmd in the Windows search box and click Run as administrator.
- Copy and paste the following commands. Hit Enter after each.
Now reboot the computer. After that, update your PC to see if the error is fixed.
Sometimes system files like DLL files may go wrong without notification but hinder the system performance. In this case, an automatic system repair tool Fortect may suit your need.
Fortect is a powerful software that restores or replaces Windows files automatically after scanning. Apart from that, it’s able to remove malware threats, free precious disk space, restore max performance, and so on.
- Download and install Fortect.
- Open Fortect and run a free scan. Wait for the program to detect and diagnose issues for you.
- At the end of the scan, you can check your computer’s Hardware, Security, and Stability in comparison with a worldwide average. Besides, a summary of the issues detected will show up. Click Start Repair and you’ll be prompted to purchase.
Fortect comes with a 60-day Money-Back Guarantee so you can refund anytime if Restoro doesn’t fix your problem.
Fix 3 Turn off Firewall temporarily
Windows Firewall is likely to overprotect and block the connection with the Windows update server. To figure that out, just temporarily disable the Firewall to have a test.
Be extra careful to access the Internet during this period as your computer is vulnerable without protection.
- Type defender firewall in the Windows search bar and click Windows Defender Firewall.
- Choose Turn Windows Defender Firewall on or off.
- Turn off Windows Defender Firewall for Domain, Private and Public networks. Then click OK to save the change.
If you have installed any other third-party antivirus, also disable them temporarily by exiting or following the official guideline.
Then you can run the Windows Update again to check for any improvement. Remember to turn on these protections after the testing.