
![Ошибка обновления windows 10 0x8024401c [fix]](http://nephros-crimea.ru/wp-content/uploads/4/f/6/4f6ab85e18e1bfc11e6e9fa4cad918bb.png)
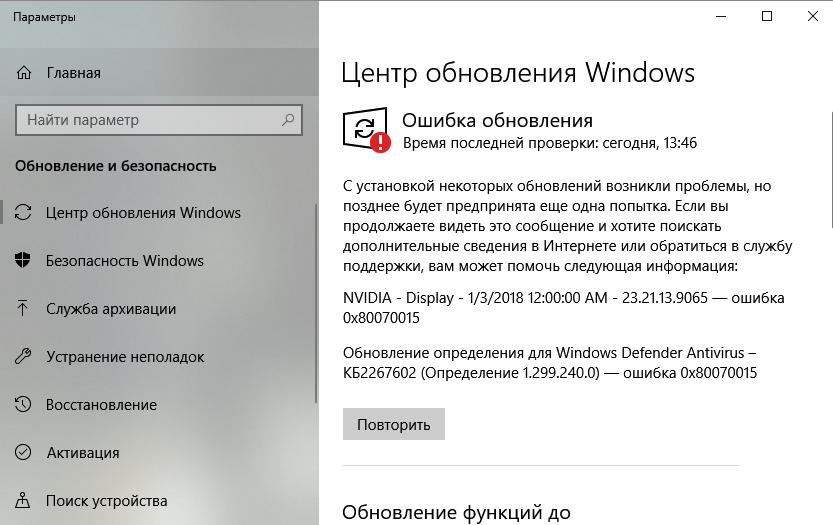
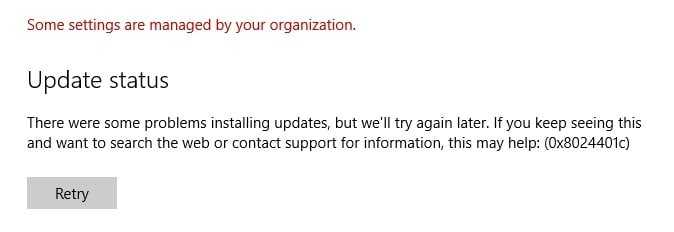
Исправить ошибку Центра обновления Windows 0x8024401f, 0x8024402f
Если вы столкнулись с этим Ошибка обновления Windows 0x8024401f проблему, вы можете попробовать наши рекомендуемые решения в указанном ниже порядке, чтобы решить эту проблему.
- Отключить стороннее программное обеспечение безопасности
- Запустите средство устранения неполадок Центра обновления Windows
- Сбросить кеш Магазина Windows и очистить кеш Центра обновления Windows
- Удалите VPN-клиент или удалите прокси-сервер
- Выполните новый запуск, обновление на месте или сбросьте настройки облачного хранилища.
Давайте посмотрим на описание процесса, связанного с каждым из перечисленных решений.
1]Отключить / удалить стороннее программное обеспечение безопасности (если применимо)
Брандмауэр и антивирус важны для безопасности вашей системы, но иногда эти программы могут мешать работе Windows 10 и вызывать это. Ошибка Центра обновления Windows 0x8024401f появиться.
Известно, что McAfee, AVAST и Comodo вызывают именно эту проблему. В этом случае, чтобы решить эту проблему, вам придется удалить все сторонние антивирусные программы с вашего ПК с помощью специального инструмента для удаления всех файлов, связанных с вашей антивирусной программой.
Если удаление антивируса устраняет эту ошибку, теперь вы можете снова установить тот же антивирус, или вы можете переключиться на альтернативное программное обеспечение или, еще лучше, придерживаться собственной антивирусной программы Windows 10 – Защитника Windows.
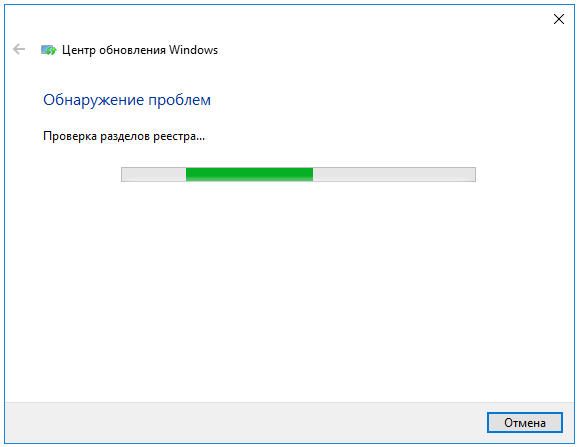
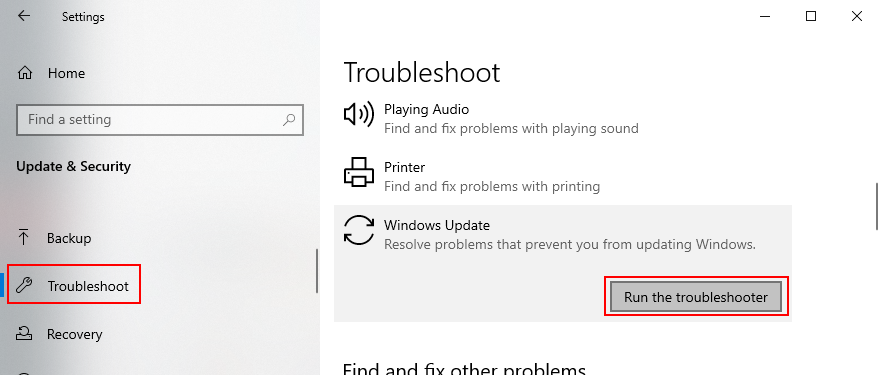
2]Запустите средство устранения неполадок Центра обновления Windows.
Для этого решения необходимо запустить встроенное средство устранения неполадок Центра обновления Windows и посмотреть, поможет ли это устранить ошибку.
3]Сбросить кеш Магазина Windows и очистить кеш Центра обновления Windows.
Это решение требует, чтобы вы очистили содержимое папки распространения программного обеспечения, а также очистили / сбросили кеш Microsoft Store, а затем снова повторили процесс обновления. Если ошибка все еще не устранена, перейдите к следующему решению.
4]Удалите VPN-клиент или удалите прокси-сервер (если применимо).
VPN-клиент или прокси-сервер могут вызвать эту ошибку из-за какого-либо вмешательства, которое в конечном итоге блокирует связь между вашим клиентским компьютером с Windows 10 и сервером Windows Update. В этом случае вы можете попробовать удалить программное обеспечение VPN с помощью апплета «Программы и компоненты» в Windows 10 или удалить любой прокси-сервер со своего компьютера и посмотреть, решит ли это проблему.
5]Выполните «Новый запуск», «Восстановление на месте» или «Облако сброса».
На этом этапе, если Ошибка Центра обновления Windows 0x8024401f до сих пор не решена, скорее всего, это связано с каким-то повреждением системы, которое нельзя решить традиционным способом. В этом случае вы можете попробовать «Новый запуск», восстановление на месте при обновлении, чтобы сбросить все компоненты Windows. Кроме того, если вы используете Windows 10 версии 1909 или более поздней, вы можете попробовать Cloud Reset и посмотреть, поможет ли это.
Любое из этих решений должно работать на вас!
Method 3: Modify the system’s setting in Registry Editor to fix 0x8024401c
Missing or defective system files can also cause the Windows update error 0x8024401c. You can modify these files in the HKEY_LOCAL_MACHINE -> Software -> Policies -> Microsoft -> Windows -> WindowsUpdate -> AU folder and fix them using the Registry Editor.
Step 1. Press Windows and R keys together to open the Run dialog box.
Step 2. In the box next to the Open: label, type regedit, and press enter.
Step 3. Navigate the following path: HKEY_LOCAL_MACHINE -> Software -> Policies -> Microsoft -> Windows -> WindowsUpdate -> AU
Step 4. Look for UseWUServer on the right side of the window.
Step 5. Right-click the file and replace the registry value data given on the far-right with 0 (zero).
Step 6. Click OK to save the changes.
Step 7. Restart the computer and check if the Windows Update now works.
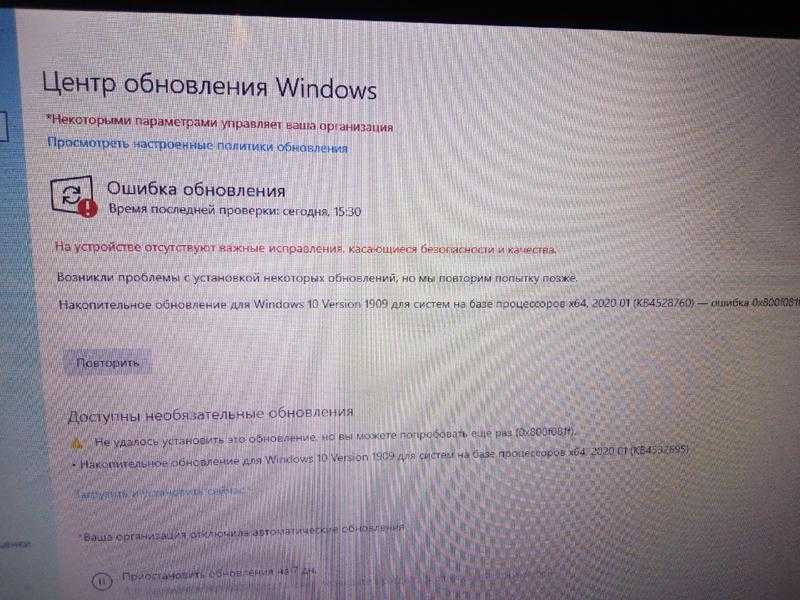
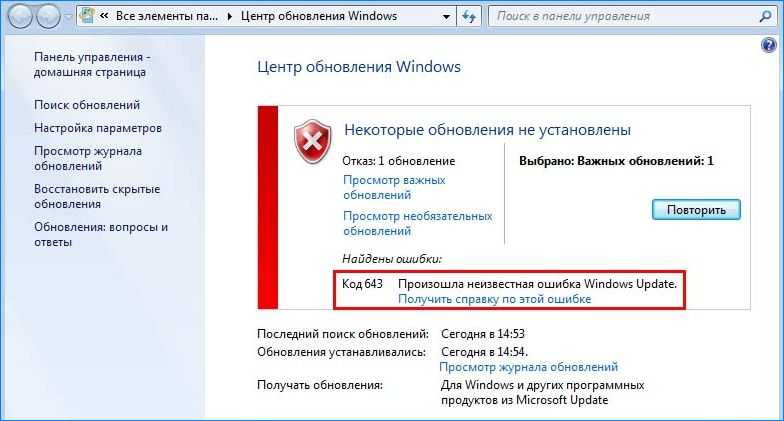
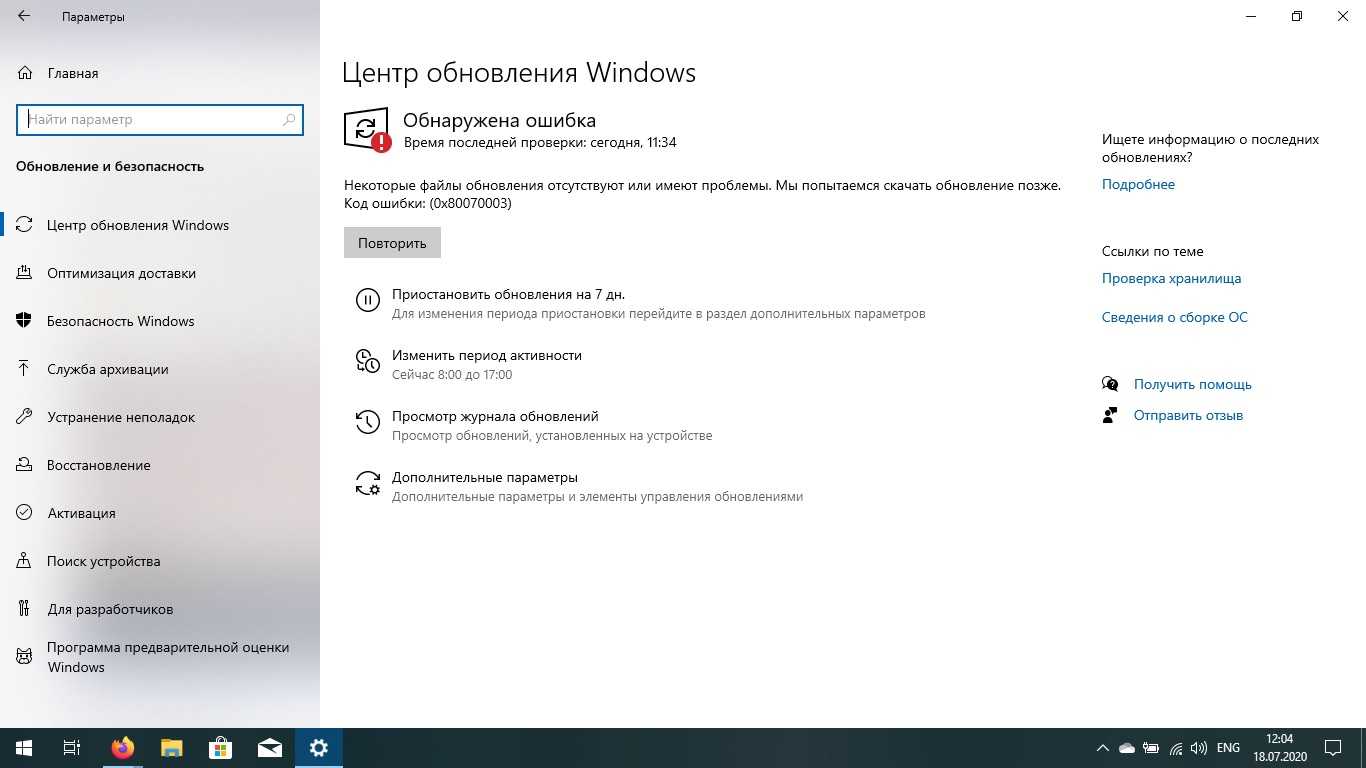
Как исправить ошибку 0x800705b4
Сразу покажу, в чем проблема у данной заразы. Все дело в том, что в вашей системе поврежден ряд, системных файлов и компонентов Windows, которые требуют восстановления, чем мы и займемся.
В моем случае и в 99% это поврежденные файлы, которые лечатся утилитой sfc. Откройте командную строку cmd от имени администратора.
Как видите по результатам сканирования систмеы, у меня появилось предупреждение.
Наши опасения подтвердились и ошибка обновления Windows 10 обнаружена, повреждены системные файлы. В итоге ошибка windows 0x800705b4 исправляется одной командой:
Если данная команда не помогла, то попробуйте перерегистрировать библиотеку wups2.dll.
- net stop wuauserv (Производим остановку службы обновления Windows 10).
- regsvr32 %WinDir%Sistem32wups2.dll.
- net start wuauserv (Производим запуск службы обновления Windows 10)
Заходим снова в центр обновления Windows и пробуем найти свежие апдейты. Как видите у меня все завелось.
Method 4: Run SFC Scan to fix 0x8024401c error
Windows comes with a System File Checker (SFC) Utility tool to automatically check and repair any missing, corrupt, or incomplete system files using the sfc/ scannow command.
Use the System File Checker utility tool to fix the system files and hopefully fix Windows Update 0x8024401c error. Follow these steps given to run the System File Checker utility tool scan:
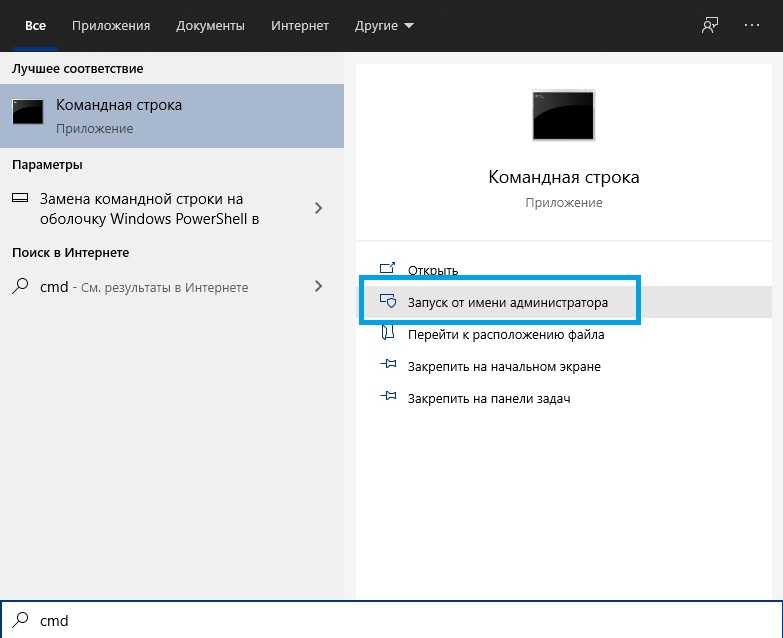
Step 1. Press Windows key icon and type cmd in the search box of Windows to open the command prompt.
![Ошибка обновления windows 10 0x8024401c [fix] - gadgetshelp,com](https://nephros-crimea.ru/wp-content/uploads/0/6/e/06ef3ca202352fad9385387a3dbd3d45.png)
![Windows update error 0x8024401c [solved]](https://nephros-crimea.ru/wp-content/uploads/4/3/1/431a95b95100e808efc3c55eaae2b9ce.png)
![Ошибка обновления windows 10 0x8024401c [fix]](https://nephros-crimea.ru/wp-content/uploads/5/b/4/5b47beeb4d4385a41023d299bc3a92d7.jpeg)
![Ошибка обновления windows 10 0x8024401c [fix]](https://nephros-crimea.ru/wp-content/uploads/d/a/5/da5e95fcbddf5463075d5998d91d0bd3.png)
Step 2. For the command prompt, select Run as Administrator from the right side. Or, right-click on the command prompt and select Run as Administrator option.
Step 3. Type in the command line of cmd, sfc /scannow and press Enter key.
Step 4. Allow the OS to complete the sfc /scannow process and repair the system files. Plugin the computer into a charger so that it doesn’t shut down in the middle of the process.
Step 5. Once the process is 100% complete, restart your computer and try to update Windows again.
Способы исправления ошибки 0x8024401c в Центре обновления Windows 10
Для решения ошибки 0x8024401C существует два способа: редактирование системного реестра и сброс параметров Центра обновления. Перед использованием любого метода рекомендуем создать точку восстановления системы и копию реестра.
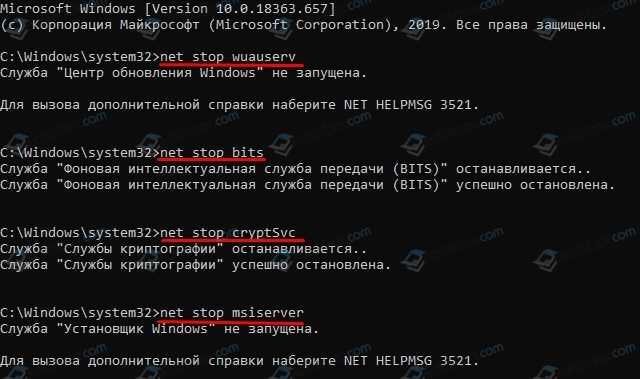
Чтобы выполнить сброс компонентов WU, стоит запустить командную строку с правами Администратора и по очереди ввести такие команды:
- net stop wuauserv
- net stop cryptSvc
- net stop bits
- net stop msiserver
- ren C:WindowsSoftwareDistribution SoftwareDistribution.old
- ren C:WindowsSystem32catroot2 Catroot2.old
- net start wuauserv
- net start cryptSvc
- net start bits
- net start msiserver
После перезагрузки ПК изменения вступят в силу. Ошибка 0x8024401c в Центре обновления Windows 10 должна исчезнуть.
Если данный способ не помог исправить ошибку, рекомендуем внести некоторые правки в системный реестр.
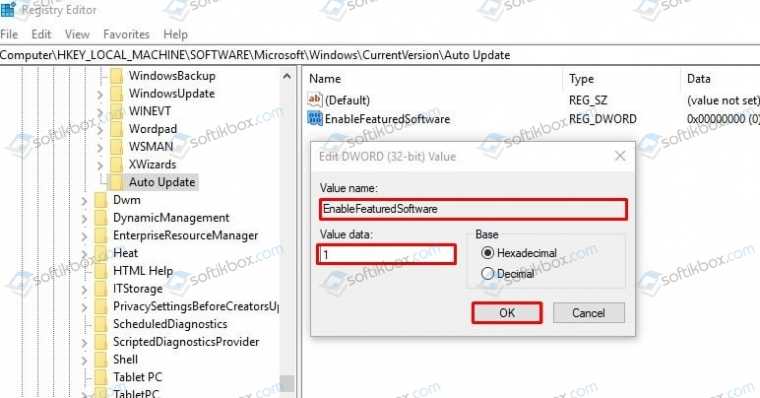
- Нужно нажать комбинацию клавиш Win+R и ввести regedit. Откроется окно системного реестра.
- Необходимо перейти по ветке: HKEY_LOCAL_MACHINESOFTWAREMicrosoftWindowsCurrentVersionWindowsUpdateAuto Update.
- В окне справа находим параметр «EnableFeaturedSoftware». У него будет значение «0». Двойным кликом открываем параметр и задаем ему значение «1».
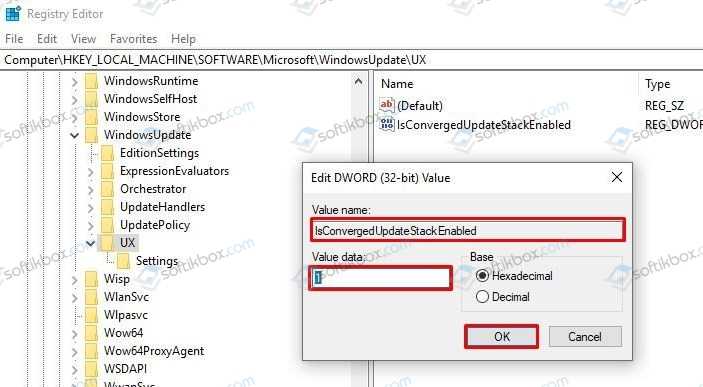
Не закрываем реестр. Переходим по ветке HKEY_LOCAL_MACHINESOFTWAREMicrosoftWindowsUpdateUX. Дважды кликаем по параметру «IsConvergedUpdateStackEnabled» и задаем ему значение «0».
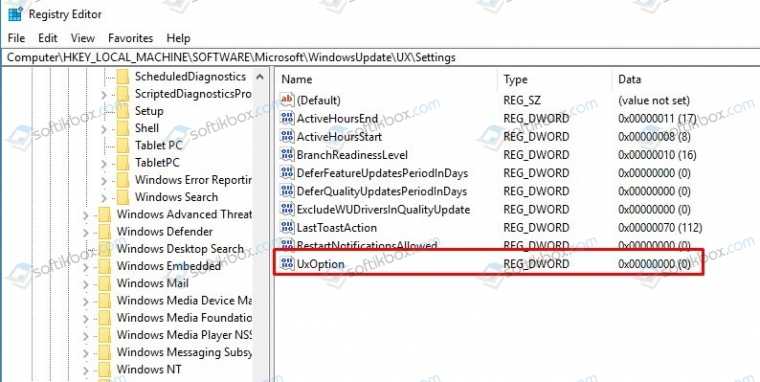
Далее переходим еще по одному адресу в редакторе реестра HKEY_LOCAL_MACHINESOFTWAREMicrosoftWindowsUpdateUXSettings. Дважды нажимаем на UxOption и задаем данному параметру значение «0».
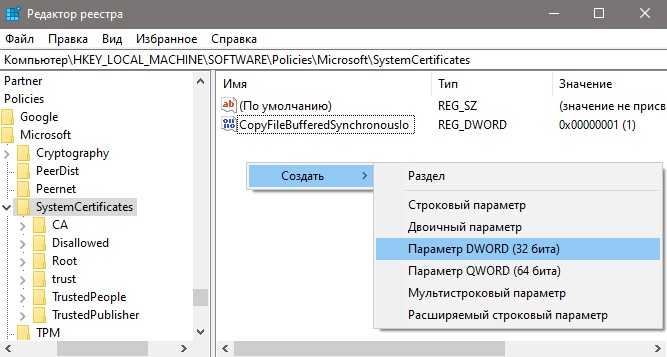
- Чтобы избавиться от ошибки 0x8024401c, стоит внести правки еще в один параметр. Переходим по ветке HKEY_LOCAL_MACHINESOFTWAREPoliciesMicrosoftSystemCertificates. Здесь находим параметр «CopyFileBufferedSynchronousIo». Задаем этому параметру значение равно «1».
- Теперь перезагружаем систему, чтобы изменения вступили в силу.
Если у вас установлена Technical Preview, то нужно отредактировать параметр «UseWUServer» (задаем 0), который расположенный по адресу HKEY_LOCAL_MACHINESOFTWAREPoliciesMicrosoftWindowsWindowsUpdateAU.
В случае, если исправить ошибку вышеописанными способами не удалось, стоит сбросить настройки DNS. Для этого нужно открыть консоль с правами Администратора и ввести по очереди такие команды:
- netsh winsock reset — сброс Winscock.
- ipconfig /flushdns — сброс DNS-кеша.
- netsh int ip reset resettcpip.txt — сброс TCP/IP.
- ipconfig /renew — обновление IP-адреса
Если и сброс параметров сети не помог избавиться от ошибки, то тогда откат системы должен помочь её решить.
Источник
Method 1: Check your network settings to fix 0x8024401c
The most common cause behind the windows update error is the unstable network connection. So, first, let us check that and fix it using the two settings:
1. Switch the network connection in your computer
2. Uncheck IPv6 network
1. Switch the network connection in your computer
Switching between Wi-Fi and ethernet connection could be the key to fixing Windows update errors. Before that, turn the Wi-Fi off on your computer and then turn it on again. If it doesn’t work, then try switching.
If you are using Wi-Fi, try to reconnect to your internet connection using an ethernet cable. In case you are using an ethernet cable, then try to connect your computer using Wi-Fi.
After switching between the network, try to update to Windows 10. Hopefully, the error would have been fixed.
2. Uncheck IPv6 network
Two types of IP addresses are available for any system: IPv4 and IPv6. These addresses are used to identify your system on the network, similar to your house address.
Sometimes, the IPv6 address can cause issues and restrict Windows from connecting to the Windows update server. Unchecking the IPv6 network can help you fix the error.
Step 1. Right-click on the Internet icon given on the bottom right corner of your screen.
Step 2. Click on the Open Network & Internet Settings option.
Step 3. Move to the Network and Sharing Center option in the Status panel.
Step 4. In the Network and Sharing Center window, click on Change adapter settings on the left side.
![Ошибка обновления windows 10 0x8024401c [исправить] - исправлять 2023](https://nephros-crimea.ru/wp-content/uploads/0/b/1/0b1c383a9a099f0ca7e757f6c2bf7cac.jpeg)
![[решено] ошибка 0x8024401c в центре обновления windows - другой](https://nephros-crimea.ru/wp-content/uploads/b/e/5/be5f66ae8216effd127748209316b187.jpeg)
![[solved] windows update error 0x8024401c - minitool partition wizard](https://nephros-crimea.ru/wp-content/uploads/0/7/0/0701c22033901efa096be35b31be4bb5.png)

Step 5. Right-click on the type of connection you are currently using, e.g., Wi-Fi, LAN, or Ethernet. Click on Properties.
Step 6. Scroll down and navigate to Internet Protocol Version 6 (TCP/IPv6) in the Properties window and uncheck the box.
Step 7. Click OK button.
Step 8. Restart your computer. Once the system restarts, check for windows updates.
Method 5: Perform a clean system boot to fix 0x8024401c
We hope that you can fix Windows update 0x8024401c error by now and that the above fixes were helpful. However, if you are stuck with it, here’s another method: a clean boot to help you fix the error.
Step 1. Press the Windows key + R key together to open the run dialog box.
Step 2. Next to the Open: label, type msconfig, and press enter.
Step 3. In the open System Configuration window, navigate to the Services tab and scroll down to the bottom of the window.
Step 4. Check the Hide all Microsoft Services checkbox.
Step 5. Click on the Disable all button to disable all other services and then click OK.
Step 6. Restart your computer. Check if the Windows update works correctly.
Method 2: Update drivers
The Windows update error 0x8024401c can occur if the drivers installed in your computer aren’t compatible or are problematic.
Drivers for peripheral devices such as printers, ethernet cards, etc., can obstruct Windows updates if they are problematic.
1. Manual Update
You should always install generic drivers available on the original driver manufacturers’ website. Here is how you can do it:
Step 1. Press Windows + X keys together.
Step 2. Navigate to the Device Manager.
Step 3. Right-click on the driver that isn’t working correctly.
Step 4. Uninstall the driver.
Step 5. Go to the driver manufacturer’s website and download the driver using the information of your operating system and processor.
Step 6. Install the driver and restart your computer. Check for updates.
2. Automatic update
Manually downloading each driver after checking its compatibility is a cumbersome task. Also, if you install the wrong one, then there is a strong chance of failure.
Using third parties such as DriverFix and Driver Easy can automatically install and update compatible drivers on your PC, thereby freeing you of the complex decision process.
You won’t have to constantly check every driver for an update as this software can automatically do that for your PC.
DriverFix
Step 1. Go to the DriverFix website and download and install it.
Step 2. Run the software and wait for it to check your computer requirements and faulty drivers.
Step 3. After the system scanning is done, you can see a list of problematic drivers.
Step 4. You can choose the drivers you wish to update. The software will do the update for you.


![Ошибка обновления windows 10 0x8024401c [fix]](https://nephros-crimea.ru/wp-content/uploads/4/f/6/4f6ab85e18e1bfc11e6e9fa4cad918bb.png)
Step 5. Restart your computer. Check if you can update Windows 10.
Step 1. Go to the Driver Easy website and download and install the software.
Step 2. Run the Driver easy application and click on Scan Now to begin scanning your PC for all possible driver fixes.
Step 3. You can see a list of drivers that require an update. Click on the Update button next to each driver to update them individually. Alternatively, you can also click on the Update All button to update all the drivers at once.
Step 4. Restart your computer once the process completes and check if the Windows update error 0x8024401c is fixed.
Устраняем ошибку 0x8024402f в Windows 10 при помощи реестра
Нажмите «Пуск» — «Выполнить» — «REGEDIT». В открывшемся редакторе реестра перейдите по пути: HKLMSoftwarePoliciesMicrosoftWindowsWindowsUpdate
Обратите внимание на параметр WUServer – он отвечает за хранение информации о доступных серверах обновлений
Важно, чтобы в параметрах WUServer и WUStatusServer было верное значение, например: http://имя _сервера:8530
Сделайте экспорт папки WindowsUpdate, нажав на ней правой кнопкой мыши и нажав «Экспорт», а затем удалите ее из реестра.
Перезагрузите компьютер и перезапустите службу обновлений (Панель управления – Администрирование – Службы – Центр обновления Windows). Запустите процедуру обновления и посмотрите результат.
В случае обнаружения ошибок нажмите «Исправить» и перезагрузите компьютер после завершения всех исправлений.
Ну если уж совсем ничего не помогает, попробуйте воспользоваться специальной утилитой от Microsoft – «Microsoft’s Update Troubleshooter», которая создана для устранения неполадок с обновлениями в Windows, например, таких как 0x8024402f.
www.averina.com